Are you ready for the second part of our master bedroom reveal and a step by step tutorial on how to re-upholster a divan base?!

(If you missed the first part of this post where I showed you how we stenciled a feature wall in our bedroom you can catch up here.)

Our bedroom is not a bad size by British standards but -and this is a massive but- it lacks in storage. Big time! We only have our tiny wardrobe and a separate cupboard with some deep shelves for our clothes so it was inevitable that the time would came to start looking for more space where to put our stuff.
On the other hand our Malm bed needed to be replaced. We got it about 6 years ago when we bought our first house and although I liked it very much back then, with time its height started to be a problem: it was so low that it was a real effort to climb out of it in the morning; there was no space underneath for storing anything and for some reason Ikea seems to make their beds bigger than the standard mattress sizes.
 | |
| Malm Bed in Our First House |
I managed to find a second-hand divan base with four drawers for £30 (we kept our own matress, of course!). We went from no under-bed storage to FOUR big drawers! Oh yeah! The downside? I didn't like the fabric that came with the base so I decided to re-upholster it.

My goodness what a job! Removing all those staples to start with!

Once all the staples and old fabric were off, the fun started!
I wrapped the charcoal Ikea fabric tightly around the base, pinned both ends together, removed the fabric from the base and sewed a straight line where I'd put the marker pins. I ended up with something that looked like a big charcoal fabric bracelet which then fitted back over the base.
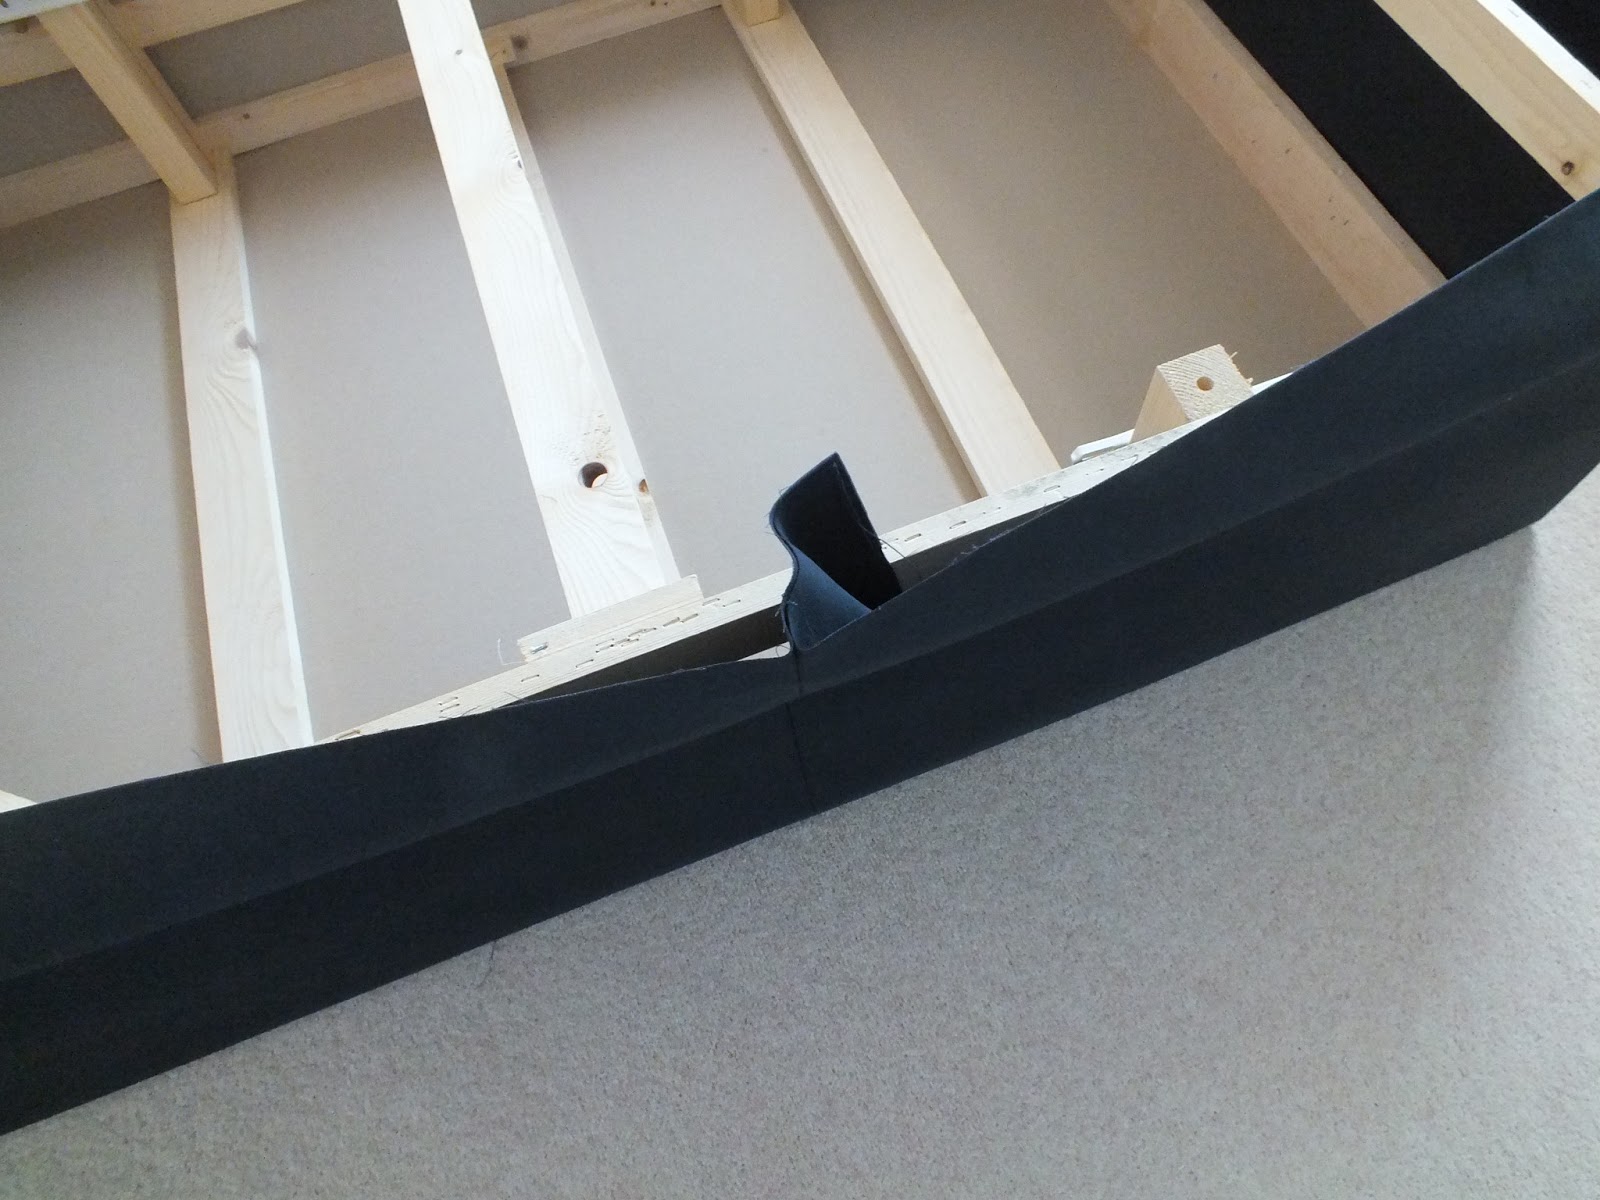
We started by stapling both longest sides.

We then cut the space for the drawers making sure we had enough fabric to cover around the edges.

Now here comes the part that I would do differently if I were to go through a period of amnesia and totally forget that I promised not to try re-upholstering again: the top. We actually stapled it as well but the correct way of doing it would have been sewing a rectangular piece of fabric to the the one we put around the base. Nevermind, we can't see the staples when the mattress is on!

We did the drawers using the old fabric as a template to cut the charcoal one and we were done!
Those white bedside tables you see here are the ones that hubby is putting together in one of the first pictures. They are actually children's chest of drawers that we got from Argos for £60 each. We replaced the white wooden chunky knobs that came with them for some glass ones we got in Homebase. This was one more way of adding that all-important extra storage.
After a long search, we also found a lovely shade for our light (or as Hubby called it, a "boutique chandelier"...) in Marks and Spencer during one of their 20% off days.
After a long search, we also found a lovely shade for our light (or as Hubby called it, a "boutique chandelier"...) in Marks and Spencer during one of their 20% off days.
So, finally this is how our bedroom is looking at the moment.

Oh! and that gorgeous big dresser is another score from Gumtree. We are planning to live with it for some time and then decide whether we'll be painting it in some crazy colour. We'll see.
Although the bedroom is looking good, I'm afraid we still have some way to go until I'll be able to call it finished. We still need to:
- buy and set up a charcoal headboard (we already have one in our sights!)
- buy and put up curtains (I'm unsure about this one. Any suggestions on colours, patterns?)
- get new bedding
- get accesories in teal and yellow
Gaby X
I'm linky partying at: House of Rose Blog, Home Stories A to Z, The Shabby Creek Cottage and Tatertots & Jello
Saw you on House of Hepworths. I haven't seen this idea anywhere. What a wonderful, daring project! Wish I'd thought of it myself. Pinning now!
ReplyDeleteThanks.
Thanks for stopping by and taking the time to leave such a nice comment!
DeleteI love this idea!
ReplyDeleteThanks for stopping by! :o)
DeleteGaby X
What a brilliant idea! We have reupholstered our dining room chairs maybe this could be next......
ReplyDeleteYes, go on girl! It's a tedious but not difficult job!
DeleteGaby X
Great idea! And what a money saver!
ReplyDeleteThe room looks amazing! I reupholster chairs and things like that, but love the upholstered base! You did a great job!
ReplyDeleteJill
http://iknowtheplansihave4you.blogspot.com
He llegado a tu blog a través de la fiesta de enlaces y estoy alucinando con lo que veo!!!! Vaya cambiazo de habitación!! Parece otra casa. Enhorabuena. Te ha quedado de revista de decoración.
ReplyDeleteGracias Patricia! Es increíble lo que un poco de pintura puede hacer por una habitación.
DeleteGaby x
I have been planning on doing this for my boy's beds. Yours came out fantastic! Stopping by from Our Fifth House.
ReplyDeletesuch a nice interior decorating ideas you provide.It really helps me to find out best.Great tips you provides.Thanks for such a nice post.
ReplyDeleteWow, this is amazing!!! Gorgeous! Thanks for linking up!!!
ReplyDeleteThank YOU Mandy for hosting this party together with the other lovely ladies :o)
DeleteGaby x
Oh my goodness! What a task, but the outcome is absolutely professional looking and, um... AMAZING! Congrats! The hard work paid off and it turned out absolutely fabulous! So happy you shared, very inspiring!
ReplyDeletexo,
Jen
Wow you have done an excellent job and the way you have used black fabric for the bed boxes is looking superb, I enjoyed reading this.
ReplyDeleteSeptic Pumping NJ
This is amazingly gorgeous! Wish you could come and design my entire house!
ReplyDeleteI would love to! ;)
Deleteamazing collection thanks for sharing.online mattress and bed retailer
ReplyDeleteGreat results! I'm inspired. Totally gonna try this. Can I ask: how much fabric did you use/buy? Thanks so much!
ReplyDeletegrey curtains with white detailing, paint the dresser a grey -shade darker than the walls or be bold and paint it yellow and bring the yellow to the bed area with pillows and throw, add a chair or two and create a seating area. add abstract painting with greys silvers, yellow and blues to finish the space
ReplyDelete